Hello folks,
Thank you sooo much for liking my blog and for all the sweetness that’s been coming my way-It feels so good.
I hope you had a relaxing weekend .Today,I will be sharing some jewellery pieces from my collection.Ever since a good friend of mine has introduced me to the world of beads and gems-I’ve started designing my own jewellery and I also make them for friends and family. I feel they make great gifts,nothing can beat the pleasure of a handmade present right?
Whether your style is classy,trendy or casual,I think every girl deserves a bevy of bead necklaces to complete her wardrobe.
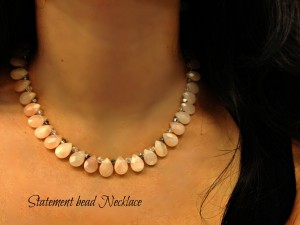
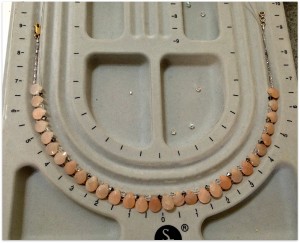
These are a few pieces from my collection.I think bead necklaces make a subtle but strong impression if worn right.I usually gravitate towards simple designs in pretty colors when it comes to beads.This one’s a recent addition to my collection.
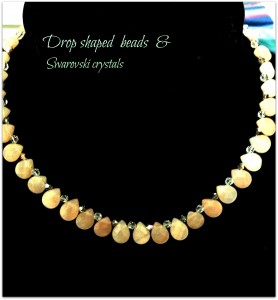
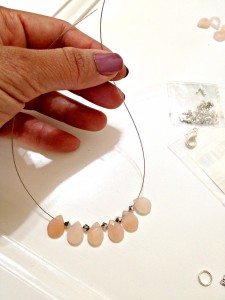
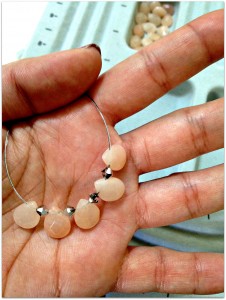
I bought the drop shaped beads at a gem show a year ago .It was a small string of beads on sale for 4$ and I had no idea what kind of bead it was,but I snagged it just because I liked the pretty peach color (I’m a sucker for pastels) and shape.I had some Swarovski crystals and decided to go with a clean design and I made this over the weekend,during my son’s nap time.It took me around 45 minutes from start to finish and I’m mighty pleased with my new design.
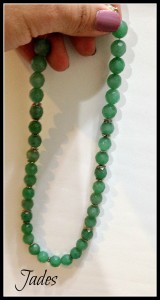
This is another one I’ve designed a while ago .I used some spacers and green jades and I just love it.
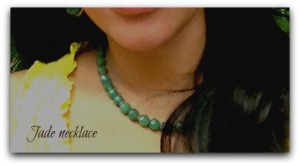
The pic doesn’t do justice .This is how it looks when I have it on.
If you want to DIY your own piece- this is what you’ll need-(most of them can be found at any crafts stores like Michael’s,hobby lobby ,etc.I got my supplies a couple of years back from a gem show and have been using them till date.
You will need-(I already had the supplies-so total cost of this project=0$)
Bead stringing wire-19″ gauge ( You can make at least 20 necklaces/bracelets with the entire roll,that’s 30ft)
Chain nose pliers
beads of your choice
crimp beads (refer to the picture)
clasps or hooks,jump rings (see the picture)
spacer beads-I used Swarovski crystals
scissors
bead board or a measuring scale (optional,good to have)
- First ,decide on the length of the necklace -It’s best if you use an existing chain you always wear ,you can use that length for reference
- Now decide on the pattern /design you want.Mix and match , play around-endless fashionable possibilities I must say
- Now cut the wire 2-3inches longer than the length you want,just so you have some slack.You can use a scissors for cutting it
- String the beads once you have decided on the design,leave at least 3inches on either side
- You will see that I added some Swarovski crystals as spacers to add some interest to the drop shaped beads
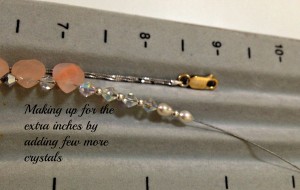
- My necklace fell short of a couple of inches since I ran out of beads at this point,so I used some left over crystals and a few pearls instead .I had to cover the extra inches (anyways this part is inconspicuous since it will be at the back of my neck)
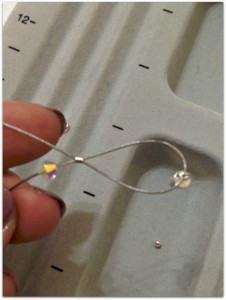
- Now start with one end of the wire and pass it through the crimp bead and jump ring( In my case it would be one end of my clasp)
- Now loop the wire over the jump ring and through the crimp bead to hold it in place(see the picture below)
- Make sure the crimp bead is slid all the way up to the edge of the jump ring so it’s nice and secure, and then simply squeeze the bead with your pliers to lock it in place. Your string is now secure.Repeat the same to the other end of the wire.Trim the excess wire.
I hope you’ve enjoyed this little tutorial! Are you inspired to create a next level look?Happy flaunting your handmade statement necklace!!!

